So, one fine day, you’re just one step behind to complete your DIY masterpiece and Snap! Your drill stopped working, and the broken drill bit is stuck in the material! No need to panic here as we have all been there, and it’s not the end of the world.
If you know how to remove a broken drill bit with available tools at hand, it’s just a matter of minutes to get that tiny thing out. Typically, using a set of pliers does the job for most people. In case you’re not that lucky, you might have to get a screw extractor.
Whatever the case is, knowing the right method is a must. So, today I’ll walk you through the process of removing a stuck drill bit and share some handy tips and tricks so that it never happens again. Without further ado, let’s jump right in.
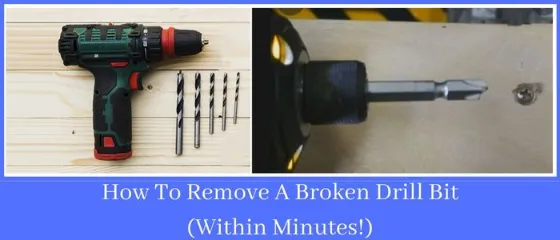
Expertly Remove a Drill Bit in 2 Easiest Methods
First things first, you have to clean the surface area around the drill bit to neatly complete your task. Use a clean rag to wipe off the dirt and small shredded metal pieces.
This way, such elements won’t come your way while working. Some like to use lubricants before starting, but I don’t recommend using them right off the bat as it reduces friction.
Let’s get into the first method.
1. How To Pull Out Broken Drill Bit Using Locking Pliers Method
I recommend you choose a method depending on how deep the drill bit has gone and whether it’s completely jammed or not. If the stuck drill bit is long and not completely jammed into the drill hole, locking pliers will help you to pull it out easily.
Here’s a step-by-step process of using locking pliers-
Step 1: Engage the Locking Pliers
As you know, locking pliers have serrated jaws for easy gripping. Similarly, your drill bits are also threaded in clockwise directions. So, you’ll be able to easily slide the locking pliers into the drill bit threads.
Take the plier’s heads and clamp them on the broken drill bit. Squeeze the plier’s hands to ensure a strong grip on the drill bit.
Step 2: Dig the Surface Deeper
If the drill bit is too small and you cannot hold it with the pliers, I have a small trick that might work. Remember, this will only work for softer materials like plastic or wood.
Take a chisel or sharp screwdriver to dig deeper around the drill bit. The extra surface will expose more of the bit, allowing you to grab it with the locking pliers.
Step 3: Twist Counterclockwise
So now you have a strong grip on the drill bit. As the drill threads are directed clockwise, you need to start twisting the bit counterclockwise to loosen it.
Use moderate pressure if needed, but don’t jerk or bend the pliers as it might break the bit, particularly the smaller ones. You must be patient here as it will be difficult to move the bit initially. However, if you keep turning properly, slowly, it will loosen and start to come out.
At this point, you can apply some oil or other lubricant like WD40 into the hole to make this process smoother.
Step 4: Pull it Out
Once the drill bit is loosened and all the threads are exposed, you can shake the bit sideways and pull it out without any issue. Don’t hurry if it doesn’t come out. Take your time and keep twisting it with the locking pliers so it will come out eventually.
2. How To Loosen A Broken Drill Bit with Screw Extractor
Don’t get worried if the previous method doesn’t work for you. This time, I have a better and more effective method for you. A screw extractor will easily pull out any broken drill bit from all types of surfaces. Let’s see how it works.
Things You’ll Need
- Safety goggles
- Screw Extractor
- Cow mouth chisel
- Center punch
- Hammer
- Wrench
- Drill
Step 1: Smoothen the Surface
Wear your safety goggles before you start, as small metal pieces fly around during the process. Now, you need to smoothen the surface area around the drill bit as much as possible.
For this, use a cow mouth chisel and place it on the jagged edges. Strike the chisel with a hammer to make the surface smooth and flat.
Step 2: Make a Divot on the Drill Bit
A pointed center punch will help you make a divot or small hole on the drill bit so that you can easily extract it later. Place the center punch right in the middle of the stuck bit and strike it carefully with a hammer.
Step 3: Create a Pilot Hole
Now it’s time to make a pilot hole for the screw extractor. Take your drill and pick a strong drill bit smaller than the broken one. Place it on the divot and carefully drill a small hole of about 1/8″-1/4″.
Make sure you’re drilling a straight line. Put required pressure and speed up if needed.
Step 4: Extract the Broken Drill Bit
As screw extractors come in various sizes, you have to pick the right one that easily fits into the pilot hole. Insert the threaded end of the extractor and twist it counterclockwise with a wrench.
Using tapping or cutting oil will help to make it smoother. Once the drill bit starts coming out, you can continue with the screw extractor or pull it out with locking pliers.
Why Did My Drill Bit Break?
From manufacturing faults to excessive pressure, drill bits can break for many reasons. Here are the most common ones-
Poor Build Quality
According to tool experts, poor build quality is one of the main causes why the drill bit breaks. Besides, many amateurs tend to use the wrong drill type for a particular material.
For example, you’ll need Solid tungsten carbide (TC) drill bits for high-strength structural steel or bricks. If you use any weaker drill bit, it will easily break while drilling.
Lower Or Higher Speed
Usually, drills come with a speed index allowing you to choose the right speed for specific tasks and materials. Increasing the speed will create high frictional heat causing the drill bit to break.
On the other hand, lower speed can increase the torque, which results in breakage.
Faulty Drill Bits
The required cutting angle of the drill bit is different for hard and soft materials. If the drill bit isn’t sharpened enough, it can’t maintain the proper cutting angle according to the material.
Hence, the bit slips and produces unnecessary heat that eventually creates cracks.
Lack of Cooling
If you drive the drill for 5 minutes at high speed, you’ll notice the bit produces unusual heat. Taking a break is necessary for such situations to prevent cracks in the drill bit.
Also, you can use coolants or lubricants to cool down the bit while working.
How to Prevent Breaking Bit While Drilling?
Now that you know why your drill bits keep breaking, let’s find out how to prevent it by following some protective methods. Follow the pro tips I have provided below-
Drill Properly
I know this is such a cliche, but knowing how to drive a drill properly can save you from loads of trouble. Learn how to assemble the drill and clamp it firmly to the workpiece.
Make pilot holes and repeatedly clear the small chips and cuttings that might block the drill bit. Besides, know the correct cutting angles for a specific material to avoid frequent breakage.
Use Cutting Oil
As drilling involves friction, drilling machines will obviously produce a generous amount of heat. Using cutting oils, coolants, or lubricants helps to dissipate the generated heat. Plus, these liquids will prevent internal clogging allowing you to drill faster without breaking the tool.
Choose Correct Drill Bit Type and Size
Drill bits have a different coating, material, and geometry. You need to know which drill bit suits your working material. Besides, choosing the right drill size is also a must.
Maintain the Standard Speed
Although it’s not possible to specify drill speed for every material and bit type, there are some standard ones that you should follow.
Your drill might come with a standard RPM chart that lists safe rotational speeds for different materials and drill bit sizes. Follow it while working if you want the best out of your tool.
Final Words
So now you know how to remove a broken drill bit. No matter what material the drill bit has chosen to stick in, you’ll be able to pull it out using my proven effective methods.
For your convenience, I have also shared some handy tricks so that you can prevent drill bit breakage in the future. So follow my leads and keep making your masterpieces without any interference.
Related Posts:
How To Change a Drill Bit Effortlessly?
What Is A Left Handed Drill Bit?