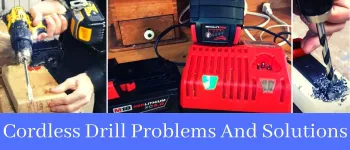
One of the most popular and useful tools in any home improvement arsenal is the cordless drill. While these drills are incredibly versatile and handy, they are not without their problems. In this blog post, we will take a look at some of the most common cordless drill problems and offer some potential solutions.
One problem that cordless drill users often face is that the batteries die quickly. This can be frustrating when you’re in the middle of a project and your drill suddenly quits on you. There are a few things you can do to help extend the life of your battery:
-Invest in a high-quality battery charger that will properly charge your batteries.
-Don’t leave your batteries sitting idle for long periods of time; if you know you won’t be using your drill for awhile, store the batteries separately from the tool.
-Try to use your drill regularly; letting it sit unused for too long can actually shorten its lifespan.
Another common issue with cordless drills is that they tend to overheat, which can damage both the tool and the batteries. To help prevent this from happening:
-Avoid using extended drilling sessions; take breaks frequently to let your tool cool down.
-Make sure that you’re using quality drilling bits; cheaper bits can cause excessive heat build-up.
Here are two more common cordless drill problems and solutions:
Problem: The drill won’t start. Solution: Check that the batteries are properly installed and charged.
If they are, then the problem may be with the switch or trigger. Try replacing these parts if you’re comfortable doing so.
Problem: The drill stops working in the middle of a job.
Solution: This is usually caused by weak batteries. Try charging them for longer or replacing them with fresh ones. If that doesn’t work, then there may be an issue with the motor or gears inside the drill.
You’ll need to take it apart to diagnose and fix this problem.
Let’s dive deep into the topic.
No Power on a Cordless Drill
Why is My Cordless Drill Not Working?
If your cordless drill is not working, there are a few things you can check to try and troubleshoot the issue. First, make sure that the batteries are properly charged. If they are low on power, they may not be able to provide enough power to run the drill.
Next, check to see if the drill bit is jammed or stuck in the chuck. If so, you will need to remove it and clean out the chuck before continuing.
Finally, if all else fails, you may need to replace the brushes in the drill.
This is a more involved repair and you may want to consult a professional if you are not comfortable doing it yourself.
Why Does My Cordless Drill Keeps Stopping?
If your cordless drill keeps stopping, it could be for a number of reasons. The most common reason is that the battery is not fully charged. If you’re using a NiCad or NiMH battery, make sure to completely discharge it before recharging to prolong its life.
Another possibility is that the drill’s chuck is not tightened properly, causing the drill bit to slip. Also, check to see if the drill bit is dull or damaged.
Finally, if none of these are the issue, it’s possible that there’s something wrong with the Drill itself and you should consult a professional.
What is the Common Cause of Breakdown of Corded Electric Drill?
When an corded electric drill breaks down, the most common cause is a loss of power. This can be caused by a number of factors, including a blown fuse, a tripped circuit breaker, or a power outage. If the drill is plugged into an outlet, check to see if the outlet is working by plugging in another appliance.
If the outlet is not working, reset the circuit breaker or replace the fuse. If the drill is battery-operated, check the batteries to make sure they are charged.
How Do You Fix a Drill That Does Not Spin?
If your drill does not spin, it is likely due to a problem with the motor. The first thing you should do is check the power source to make sure that it is working properly. If the power source is fine, then you will need to open up the drill and inspect the motor.
If the motor is damaged, you will need to replace it.
Drill Light Comes on But Not Working
If you have a drill light that comes on but does not work, it is most likely due to a problem with the batteries. The first thing you should do is check the batteries to see if they need to be replaced. If the batteries are fine, then the next step is to check the connections between the drill and the light.
Make sure that all of the connections are secure and that there is no damage to any of the wires. If everything looks good, then it is possible that the drill light itself is damaged and will need to be replaced.
Keyless Drill Chuck Problems
If you’re a handyman or woman, chances are you’ve had to deal with a keyless drill chuck at some point. If you’re lucky, it’s been nothing more than a minor annoyance. But for many people, keyless drill chucks can be a major headache.
The most common problem with keyless drill chucks is that they tend to loosen over time. This can be extremely frustrating, because it means that you have to stop what you’re doing and tighten the chuck every few minutes. In some cases, the chuck can become so loose that it falls off entirely!
Another problem that people sometimes have with keyless chucks is that they can get jammed. This usually happens when bits of metal or other debris get lodged in the chuck somehow. The best way to fix this problem is to disassemble the chuck and clean it out thoroughly.
If your keyless drill chuck is giving you trouble, don’t despair! There are plenty of ways to fix common problems. With a little patience and perseverance, you’ll be back to drilling holes in no time!
Cordless Drill Repair Services
If you’re in need of cordless drill repair near you, there are a few options. First, check if your local hardware or home improvement store offers repairs. If they don’t, there are a number of online retailers that offer drill repair services.
Finally, if you’re handy with tools, you can attempt to fix the drill yourself.
When choosing a retailer for cordless drill repair, it’s important to consider the cost of the repair and the turnaround time. You’ll also want to make sure that the retailer has experience repairing the type of drill you have.
If you decide to attempt to fix the drill yourself, be sure to consult the owner’s manual first. This will give you an idea of what parts need to be replaced and how to go about doing so. You may also want to watch some instructional videos online before beginning work on your drill.
With a little research and preparation, you can easily find cordless drill repair near you. By taking care of your drill, you can extend its lifespan and avoid having to buy a new one any time soon.
How to Test Cordless Drill Without Battery
A cordless drill is one of the most versatile and handy tools that you can own. It allows you to drill holes and drive screws with ease, and it’s portable so you can take it wherever you need to go. But what do you do when your battery dies and you need to test the drill?
Here’s how to test your cordless drill without a battery: 1. Check the connection between the drill and the battery. Make sure that the contacts are clean and free of any debris.
2. If the connections are good, try borrowing a battery from another cordless tool or from a friend. This will help rule out whether or not the problem is with your particular battery.
3. If you don’t have access to another battery, you can still test your cordless drill by using a power adapter.
Most drills come with an adapter that allows you to plug the drill into a standard outlet. Simply attach the adapter and turn on the drill to see if it works.
Keep in mind that this won’t be as powerful as using a battery, but it will give you an idea of whether or not the problem lies with the batteries or something else entirely.
Drill Battery Charger Hack
If you’ve ever had a drill battery die on you in the middle of a project, you know how frustrating it can be. Even worse is when you go to charge it and find out that your charger is broken! But don’t despair, there’s a quick and easy hack that will get your drill battery charged up in no time.
First, gather up the following materials: a 9V battery, some alligator clips, and some wire. Then follow these simple instructions:
1) Attach one alligator clip to each end of the 9V battery.
2) Clip the other ends of the alligator clips onto the corresponding terminals on your drill battery. Make sure they are tight so they won’t slip off.
3) Use the wire to create a connection between the two batteries by wrapping it around both terminals several times.
You can also use electrical tape if you have it handy.
4) Now plug your charger into the 9V battery and let ‘er rip! Your drill battery should start charging right away.
Brushless Drill Not Working
If your brushless drill is not working, there are a few things you can do to troubleshoot the problem.
First, check to make sure that the batteries are properly charged. If they are not, charge them for at least an hour before trying to use the drill again.
Next, check to see if the brushes are worn out. The brushes on a brushless drill need to be replaced periodically in order to keep the drill working properly.
Finally, make sure that there is no debris or other obstructions blocking the path of the drill bit. If there is, clear it away and try drilling again.
Conclusion
A cordless drill is a great tool to have around the house. It makes drilling holes and driving screws a breeze. But like all tools, cordless drills can sometimes have problems.
If you’re having trouble with your cordless drill, don’t despair! With a little troubleshooting, you should be able to get it running smoothly again in no time.
If neither of those solutions works, take the drill to a professional for repairs.
Related Posts:
Can You Use a Cordless Drill in the Rain?
How Can You Jumpstart a Cordless Drill Battery?